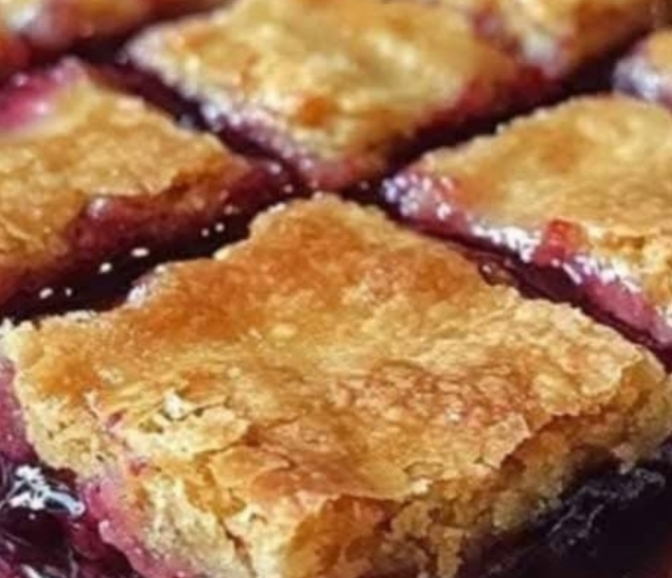
Buttery, cake-like bars swirled with sweet-tart cherry pie filling and finished with a delicate almond-vanilla glaze—these festive treats taste like mini cherry pies in bar form. Easy to make, perfect for holiday baking, and always a crowd-pleaser at cookie exchanges, family gatherings, or dessert tables.Why You’ll Love This RecipeThis isn’t just another dessert bar—it’s holiday magic on a plate. With a rich shortbread-style base, juicy cherry layers, and a hint of almond that elevates the flavor, these bars are soft, chewy, and utterly delicious. They bake up golden and tender, slice cleanly, and store beautifully—making them ideal for gift-giving or feeding a crowd.Perfect for:Christmas cookie trays and holiday partiesLast-minute dessertsSharing with neighbors and coworkersFreezer-friendly treatsIngredientsFor the Bars1 cup (2 sticks / 225g) unsalted butter, softened to room temperature2 cups (400g) granulated sugar1 tsp salt4 large eggs, room temperature1 tsp pure vanilla extract¼ tsp almond extract (key for that classic cherry-pie aroma)3 cups (360g) all-purpose flour, spooned & leveled2 (21 oz / 590g) cans cherry pie filling (use traditional red cherries, not light)For the Glaze1 cup (120g) powdered sugar, sifted½ tsp vanilla extract½ tsp almond extract2–3 tbsp milk (whole or 2% recommended)Step-by-Step Instructions1. Preheat & PrepPreheat oven to 350°F (175°C).Grease a 15×10×1-inch jelly roll pan (or 9×13-inch pan for thicker bars). For easy removal, line with parchment paper leaving overhangs.2. Make the DoughIn a large bowl using a hand mixer or stand mixer:Beat softened butter, sugar, and salt on medium speed 2–3 minutes, until light, fluffy, and pale.Add eggs one at a time, beating well after each addition. Scrape down the bowl as needed.Mix in vanilla and almond extract.Gradually add flour, mixing on low just until combined—do not overmix.3. Assemble the LayersReserve about 1½ cups of dough (roughly half)—this will be used for topping.Press the remaining dough evenly into the bottom of the prepared pan.Spread both cans of cherry pie filling evenly over the base layer.Crumble the reserved dough into small teaspoon-sized pieces and scatter over the top.. Bake to Golden PerfectionBake 30–35 minutes, until edges are golden brown and center is set (a toothpick should come out mostly clean).Cool completely in the pan on a wire rack (~2 hours).5. Make & Drizzle the GlazeIn a small bowl:Whisk together sifted powdered sugar, vanilla, almond extract, and milk, starting with 2 tbsp.Add more milk ½ tsp at a time until glaze is smooth and drizzling consistency.Drizzle over cooled bars using a spoon or piping bag.6. Slice & ServeUse a sharp knife to cut into squares or rectangles. Wipe blade between cuts for clean edges.Serve at room temperature.You Must KnowUse full-fat ingredients —low-fat versions can dry out the texture.Cool completely —this allows the filling to firm and bars to slice neatly.Almond extract is essential —it enhances the cherry flavor beautifully.Tastes better the next day! Flavors deepen overnight.Freezer-friendly —wrap tightly and freeze up to 3 months.Storage TipsStore covered at room temperature for up to 3 days, or refrigerate for up to 5 days.Freeze unglazed bars: Wrap tightly, thaw overnight, then glaze before serving.Reheat individual slices in microwave (10–15 seconds) for warm, fudgy texture.Ingredient SubstitutionsCherry pie fillingBlueberry, apple, or raspberry fillingSeasonal variationsAlmond extractAmaretto liqueur (½ tsp) or omitAdjust flavor profileButterMargarine or plant-based alternativeSlight texture changeEggsFlax eggs (2 tbsp ground flax + 6 tbsp water)Vegan option (texture may vary)All-purpose flourGluten-free 1:1 blendWorks well if GF-friendlyServing SuggestionsArrange on a platter with holiday napkins.Great for cookie swaps—cut into mini squares.Double the batch and gift in decorative tins.Pair with coffee, tea, or eggnog.Cultural ContextInspired by American Midwest baking traditions and vintage dessert bars, this recipe honors the joy of holiday sharing. Found on church tables, school bake sales, and cozy kitchens alike, it celebrates how simple ingredients can become something truly special when made with love.Pro TipsDouble the recipe? Yes—perfect for freezing or sharing.Want more tartness? Add 1 tbsp lemon juice to the pie filling.Make ahead: Assemble unbaked pan and refrigerate overnight. Bake when ready.Label your dish: People will ask for the recipe.Say “ready?” before slicing —it’s part of the ritual.Frequently Asked QuestionsQ: Can I use fresh cherries?A: Yes! Simmer 3 cups pitted cherries with ⅓ cup sugar + 1 tbsp cornstarch until thickened. Cool before using.Q: Why did my bars turn out soggy?A: Likely underbaked or cut too soon. Ensure full cooling time.Q: Is this gluten-free?A: Only if using certified GF flour blend.Q: Can I make cupcakes instead?A: Absolutely! Fill lined tins ¾ full. Bake at 350°F for 18–22 minutes.Q: Can I pipe the glaze?A: Yes! Use a zip-top bag with corner snipped for neat lines.Allergy InformationContains: dairy (butter), eggs, wheat.Gluten-free option: Use certified GF flour.Nut-free: This recipe is naturally nut-free (despite almond extract—no actual nuts).Always check labels—especially on processed ingredients and extracts.Nutrition Facts (Per Bar – Approximate)Based on 24 servings (using 15×10 pan)Calories: 280Fat: 12gSaturated Fat: 7gCarbohydrates: 40gFiber: 1gSugar: 28gProtein: 4gSodium: 220mgThese bars don’t whisper. They sit quietly on the counter, glazed and inviting, saying everything a great dessert should: “Slice me slow. Share me. This is good.” That’s how the best ones begin—not with silence, but with cherry, cheer, and someone who says, “Let’s make it together.”
Christmas Cherry Bars Recipe!!!