Table of Contents
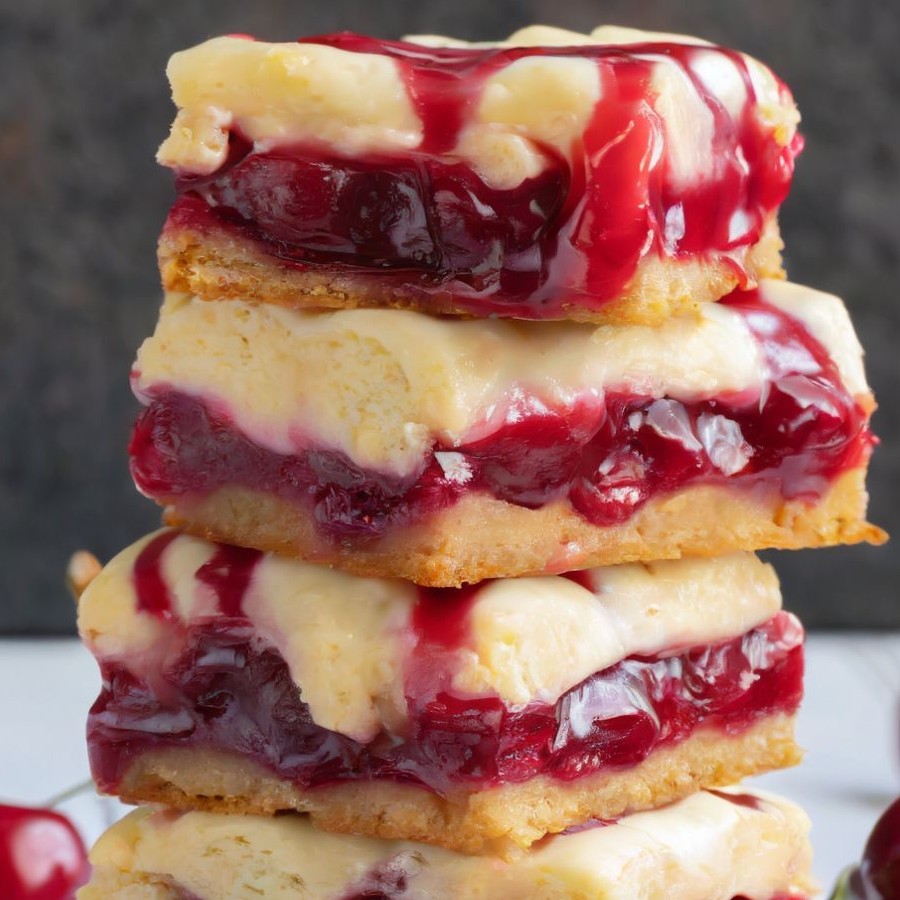
Christmas Cherry Bars
Cuisine: American
Category: Dessert
Keywords: Christmas cherry bars, holiday dessert, cherry pie bars, festive treats
Prep Time:
Cook Time:
Total Time:
Yield: 24 bars
Introduction
These Christmas Cherry Bars are a festive holiday treat that combines a soft, buttery crust, a luscious cherry filling,
and a sweet crumbly topping. With their vibrant red color and rich flavor, they are the perfect dessert for holiday gatherings, potlucks, and cookie swaps.
At tinsuf, we love creating recipes that bring family and friends together, and these bars are guaranteed to spread cheer with every bite.
Ingredients
For the Bars:
- 1 cup butter, softened
- 2 cups sugar
- 4 eggs
- 1 teaspoon vanilla extract
- 3 cups all-purpose flour
- 1 teaspoon salt
- 1 can (21 ounces) cherry pie filling
Optional Glaze:
- 1 cup powdered sugar
- 2 tablespoons milk
- ½ teaspoon vanilla extract
Instructions
- Preheat your oven to 350°F (175°C). Grease a 9×13-inch baking pan and set aside.
- In a large mixing bowl, cream together the softened butter and sugar until light and fluffy. Add the eggs one at a time, beating well after each addition. Stir in the vanilla extract.
- Gradually add the flour and salt to the wet mixture, mixing just until a smooth dough forms. Avoid overmixing.
- Spread two-thirds of the dough evenly into the prepared baking pan, pressing it down firmly to create a base layer.
- Spread the cherry pie filling evenly over the dough base.
- Crumble the remaining one-third of the dough evenly over the cherry filling to create a crumb topping.
- Bake for 40-45 minutes, or until the edges are golden brown and the center is set. Remove from the oven and allow to cool completely on a wire rack.
- Optional: In a small bowl, whisk together powdered sugar, milk, and vanilla extract until smooth. Drizzle the glaze over the cooled bars.
- Once the glaze has set, slice the bars into squares or rectangles. Serve and enjoy!
Troubleshooting & Consistency Tips
- If the dough feels too sticky, refrigerate it for 10-15 minutes before pressing it into the pan.
- Ensure the bars cool completely before slicing to prevent the cherry filling from oozing out.
- If the top is browning too quickly, loosely cover with aluminum foil during the last 10 minutes of baking.
Storage & Make-Ahead
Store the bars in an airtight container at room temperature for up to 3 days or refrigerate for up to 5 days.
To freeze, wrap individual bars tightly in plastic wrap and place them in a freezer-safe bag. Thaw overnight in the refrigerator before serving.
The bars can be made one day in advance, making them a great option for busy holiday schedules.
Why This Recipe Works
The buttery crust creates a rich, sturdy base that complements the sweet and tangy cherry filling.
Crumbling the dough on top creates a textural contrast while keeping the bars visually appealing and festive.
The optional glaze adds a touch of sweetness and an elegant finish, making these bars perfect for both casual gatherings and formal holiday events.
Expert Tips
- Use homemade cherry pie filling for a fresher, less processed flavor.
- Try substituting raspberry or blueberry filling for a fun variation.
- Drizzle white chocolate over the bars for extra holiday flair.
- Serve with a scoop of vanilla ice cream or whipped cream for an indulgent treat.